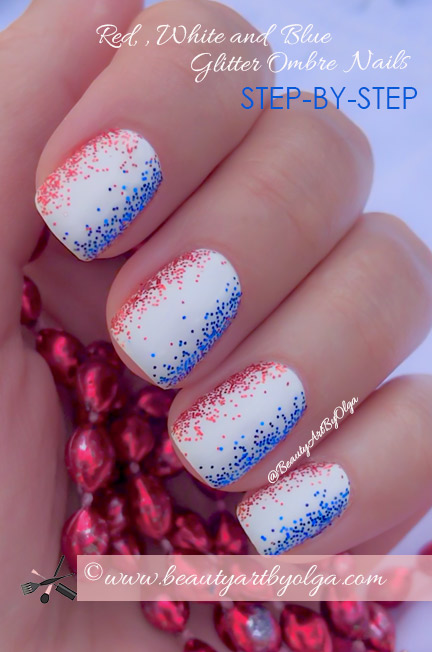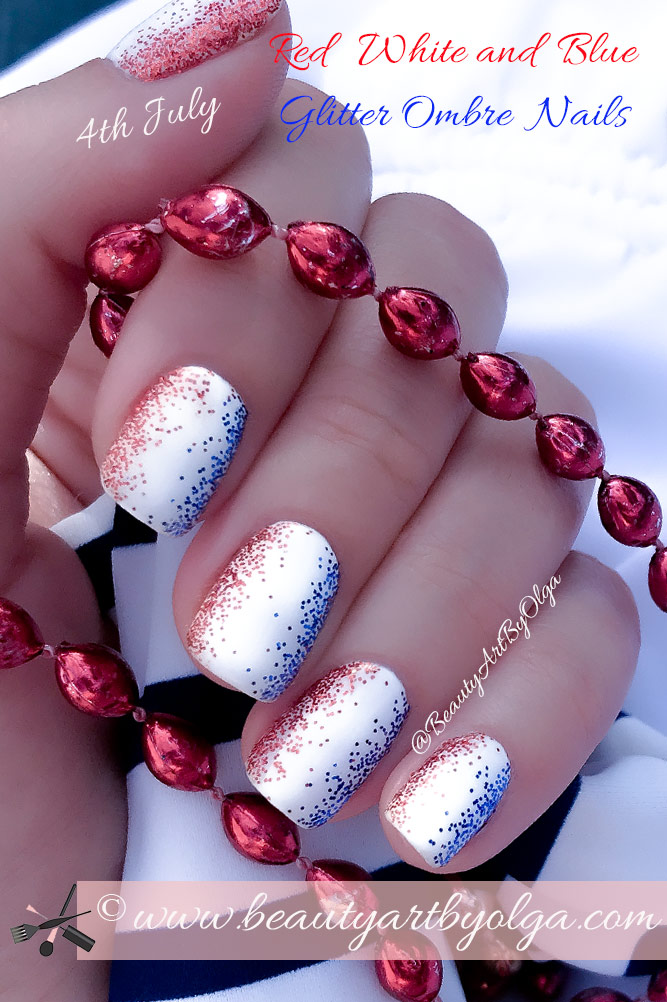
Here is a Step-By-Step Tutorial for Elegant Sparkly Red, White and Blue 4th of July Nails.
Yes it’s that time! Time for 4th of July Nails! For us No Chip Manicure people anyway. Since we wear our gel manicures between 2 and 6 weeks.
But I did include Step-By-Step Instructions for those of you who prefer to get a regular manicure. Or do it yourself.
4th of July is such an important holiday. And in my family we go all out to honor and celebrate it every year!
And Red, White and Blue Nails is no exception. For me and my clients Patriotic Nails are a must.
But it’s hard to find Ideas for 4th of July Nail Art that are simple, elegant, classy and creative, but not too much of an overkill.
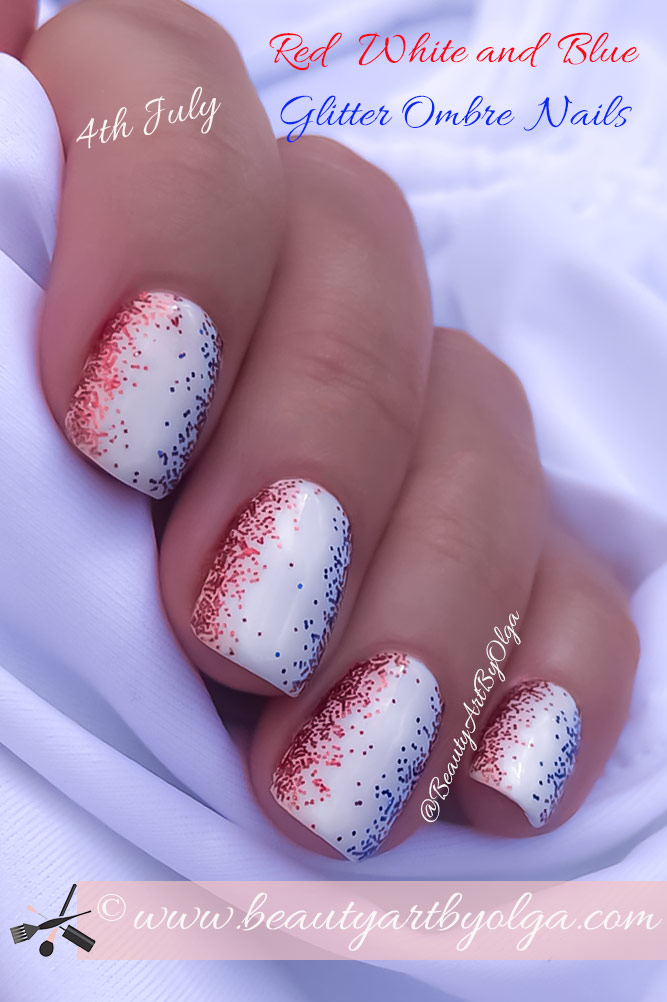
For me these White Nails with Red and Blue Sparkles are it! They are perfect Independence Day Nails. Clean, simple, elegant and patriotic! But not overwhelming. And they sure are Sparkly!
I LOVE White Nails any time of the year. And I LOVE Glitter Ombre Nail Art.
So this cute 4th of July Manicure combines it all. And of course it is Red, White and Blue – an absolute must.
While most 4th of July Manicures are very “loud” and can get to be a bit too much when worn for long period of time, this one can stay on my nails for weeks and not bother me at all.
Because Glitter Gradient done vertically on the sides adds softness to the look. Which makes it easier to wear this design for weeks and not get tired of it.
This look can be created and worn as both regular manicure as well as gel (no chip) manicure. You can use red and blue sparkly nail polish instead of loose glitter to create the glitter gradient effect.
To Create these Elegant Sparkly Red, White and Blue 4th of July Nails I used:
- Bright White Gel Nail Polish
- Non-Toxic Red Nail Art Glitter
- Non-Toxic Blue Nail Art Glitter
- Gel Brush
- Disposable Eye Shadow Applicator
Any bright white nail polish will work for this design. If you don’t have one you love, here is a link to one of my favorites:
According to my clients, this is one of The Best 4th of July Nail Designs ever! I have to agree.
My annual 4th of July Pool Party would not be complete without some All American Nails. So these American Flag inspired Nails are always one of my top choices too.
I hope you try this simple and adorable, trendy and fashionable 4th of July Nail Art Idea!
Or get an inspiration to create your own version!
Have a healthy, happy, fun and sunny summer and a great 4th of July!
And happy Summer Nails !
Follow me and keep in touch:
Sign Up for My Newsletter and Never Miss a Post:
Don’t ever let anyone dull Your Sparkle,

4th of July Nails: Red, White and Blue Glitter Gradient
HOW-TO INSTRUCTIONS:
No Chip Gel Manicure:

After completing your nail prep, apply Gel Base Coat. Then cure for the required time.
Apply 2 to 3 coats of White Gel Polish. Then cure each coat for the required time.
Lightly dip a tip of a gel brush into red glitter.
Then using light pressure press glitter into the tacky layer of the gel polish. Fade the glitter by dabbing the tip of the brush into the polish to create a gradient effect. If needed, keep dipping the tip of the applicator into glitter to add more.
Repeat Step 3 of the other side with blue glitter.
Once you have added enough glitter, use the disposable eye shadow applicator and press the glitter down gently on all the nails. It will make sure it lays nice and flat and nothing is sticking up.
Tip: Have spots where glitter didn’t stick? Apply a thin layer of base coat with tacky layer. Repeat Step 3 in missing spots.
Use a fluffy soft brush to brush off access glitter from the skin and around the cuticles.
Apply your favorite Gel Top Coat. Be sure to cap free edges. Then cure for the required time.
Tip: Sometimes glitter tends to stick up even though you pressed it down. So check to make sure there is no bumps. If any, buff off and repeat Step 7.
Tip: You may need to wipe the brush in between applications on a lint free wipe to wipe off access glitter.
Enjoy the finished look!
Regular Manicure:
After completing your nail prep, apply Base Coat of choice.
Apply 2 coats of Bright White Nail Polish.
When your polish is almost dry, but still a little tacky, lightly dip a tip of a gel brush into red glitter.
Then using light pressure press glitter into the tacky layer of the nail polish. Carefully fade the glitter by dabbing the tip of the brush into the polish to create a gradient effect. Be sure to use light pressure. This will prevent smearing the polish.
If needed, keep dipping the tip of the applicator into glitter to add more.
Tip: If the nail polish dried too much and the glitter doesn’t stick, dip the tip of the disposable eye shadow applicator into polish remover and lightly dab the wet sponge applicator onto the polish to moisten it. Then add more glitter in missing spots.
Repeat Step 3 of the other side using blue glitter.
Once you have added enough glitter, use the disposable eye shadow applicator and gently press the glitter down on all the nails. It will make sure it lays nice and flat and nothing is sticking up.
Use a fluffy soft brush to brush off access glitter from the skin and around the cuticles.
Apply your favorite Top Coat. Be sure to cap free edges.
Tip: You may need to wipe the brush in between applications on a lint free wipe to wipe off access glitter.
Tip: (Optional) Apply 2 layers of top coat to make sure the glitter is well sealed. But make sure the first layer has dried completely before applying the second.
Enjoy the finished look!

